Set Up SSO with Azure AD
This feature is only available on the Team and Enterprise Plans. If you are an existing Team or Enterprise Plan customer, continue with the setup below.
Looking for docs on how to add Single Sign-On support in your Supabase project? Head on over to Single Sign-On with SAML 2.0 for Projects.
Supabase supports single sign-on (SSO) using Microsoft Azure AD.
Step 1: Add and register an Enterprise application
Open up the Azure Active Directory dashboard for your Azure account.
Click the Add button then Enterprise application.

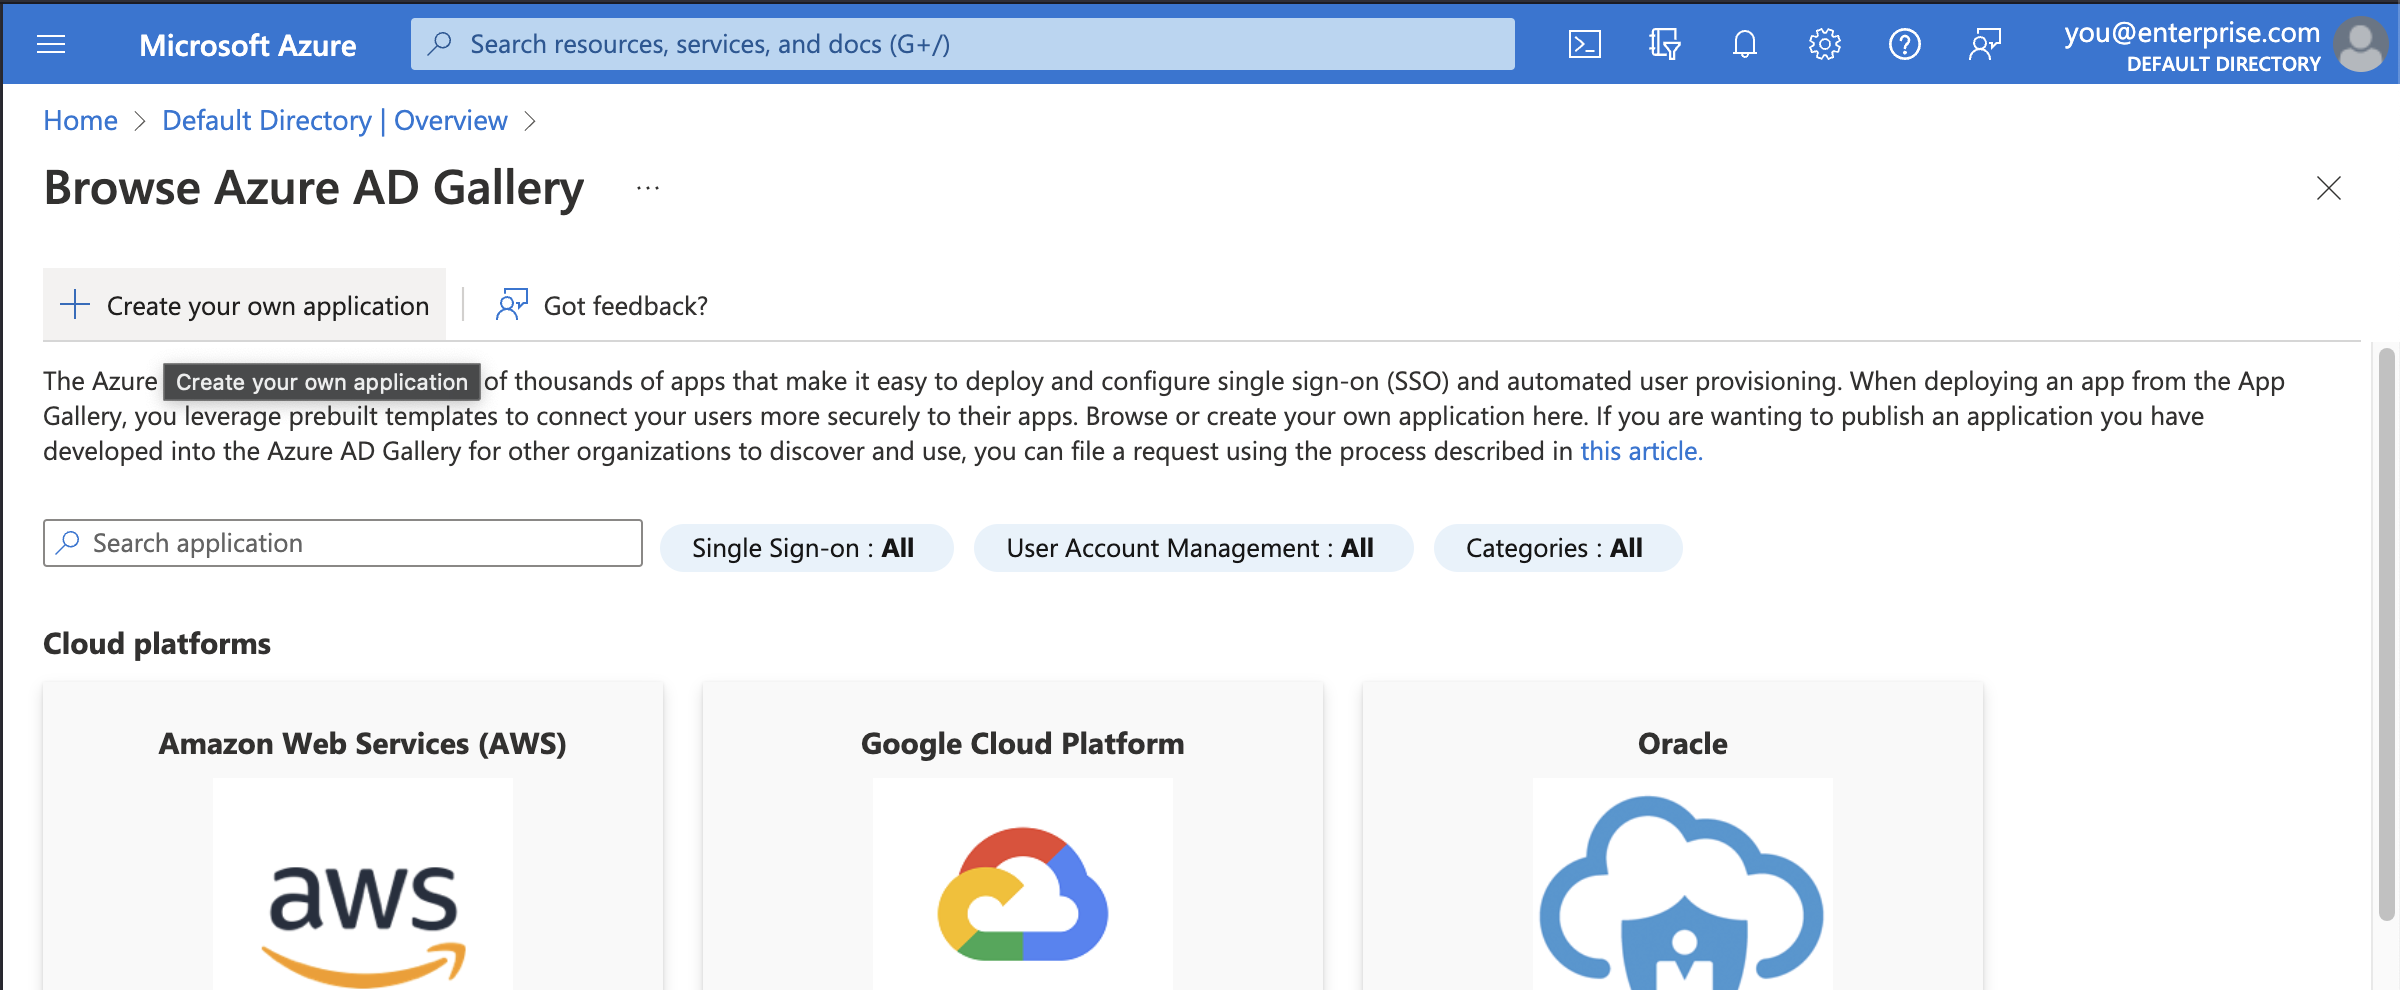
Step 2: Choose to create your own application
You'll be using the custom enterprise application setup for Supabase.
Step 3: Fill in application details
In the modal titled Create your own application, enter a display name for Supabase. This is the name your Azure AD users will see when signing in to Supabase from Azure. Supabase works in most cases.
Make sure to choose the third option: Integrate any other application you don't find in the gallery (Non-gallery).

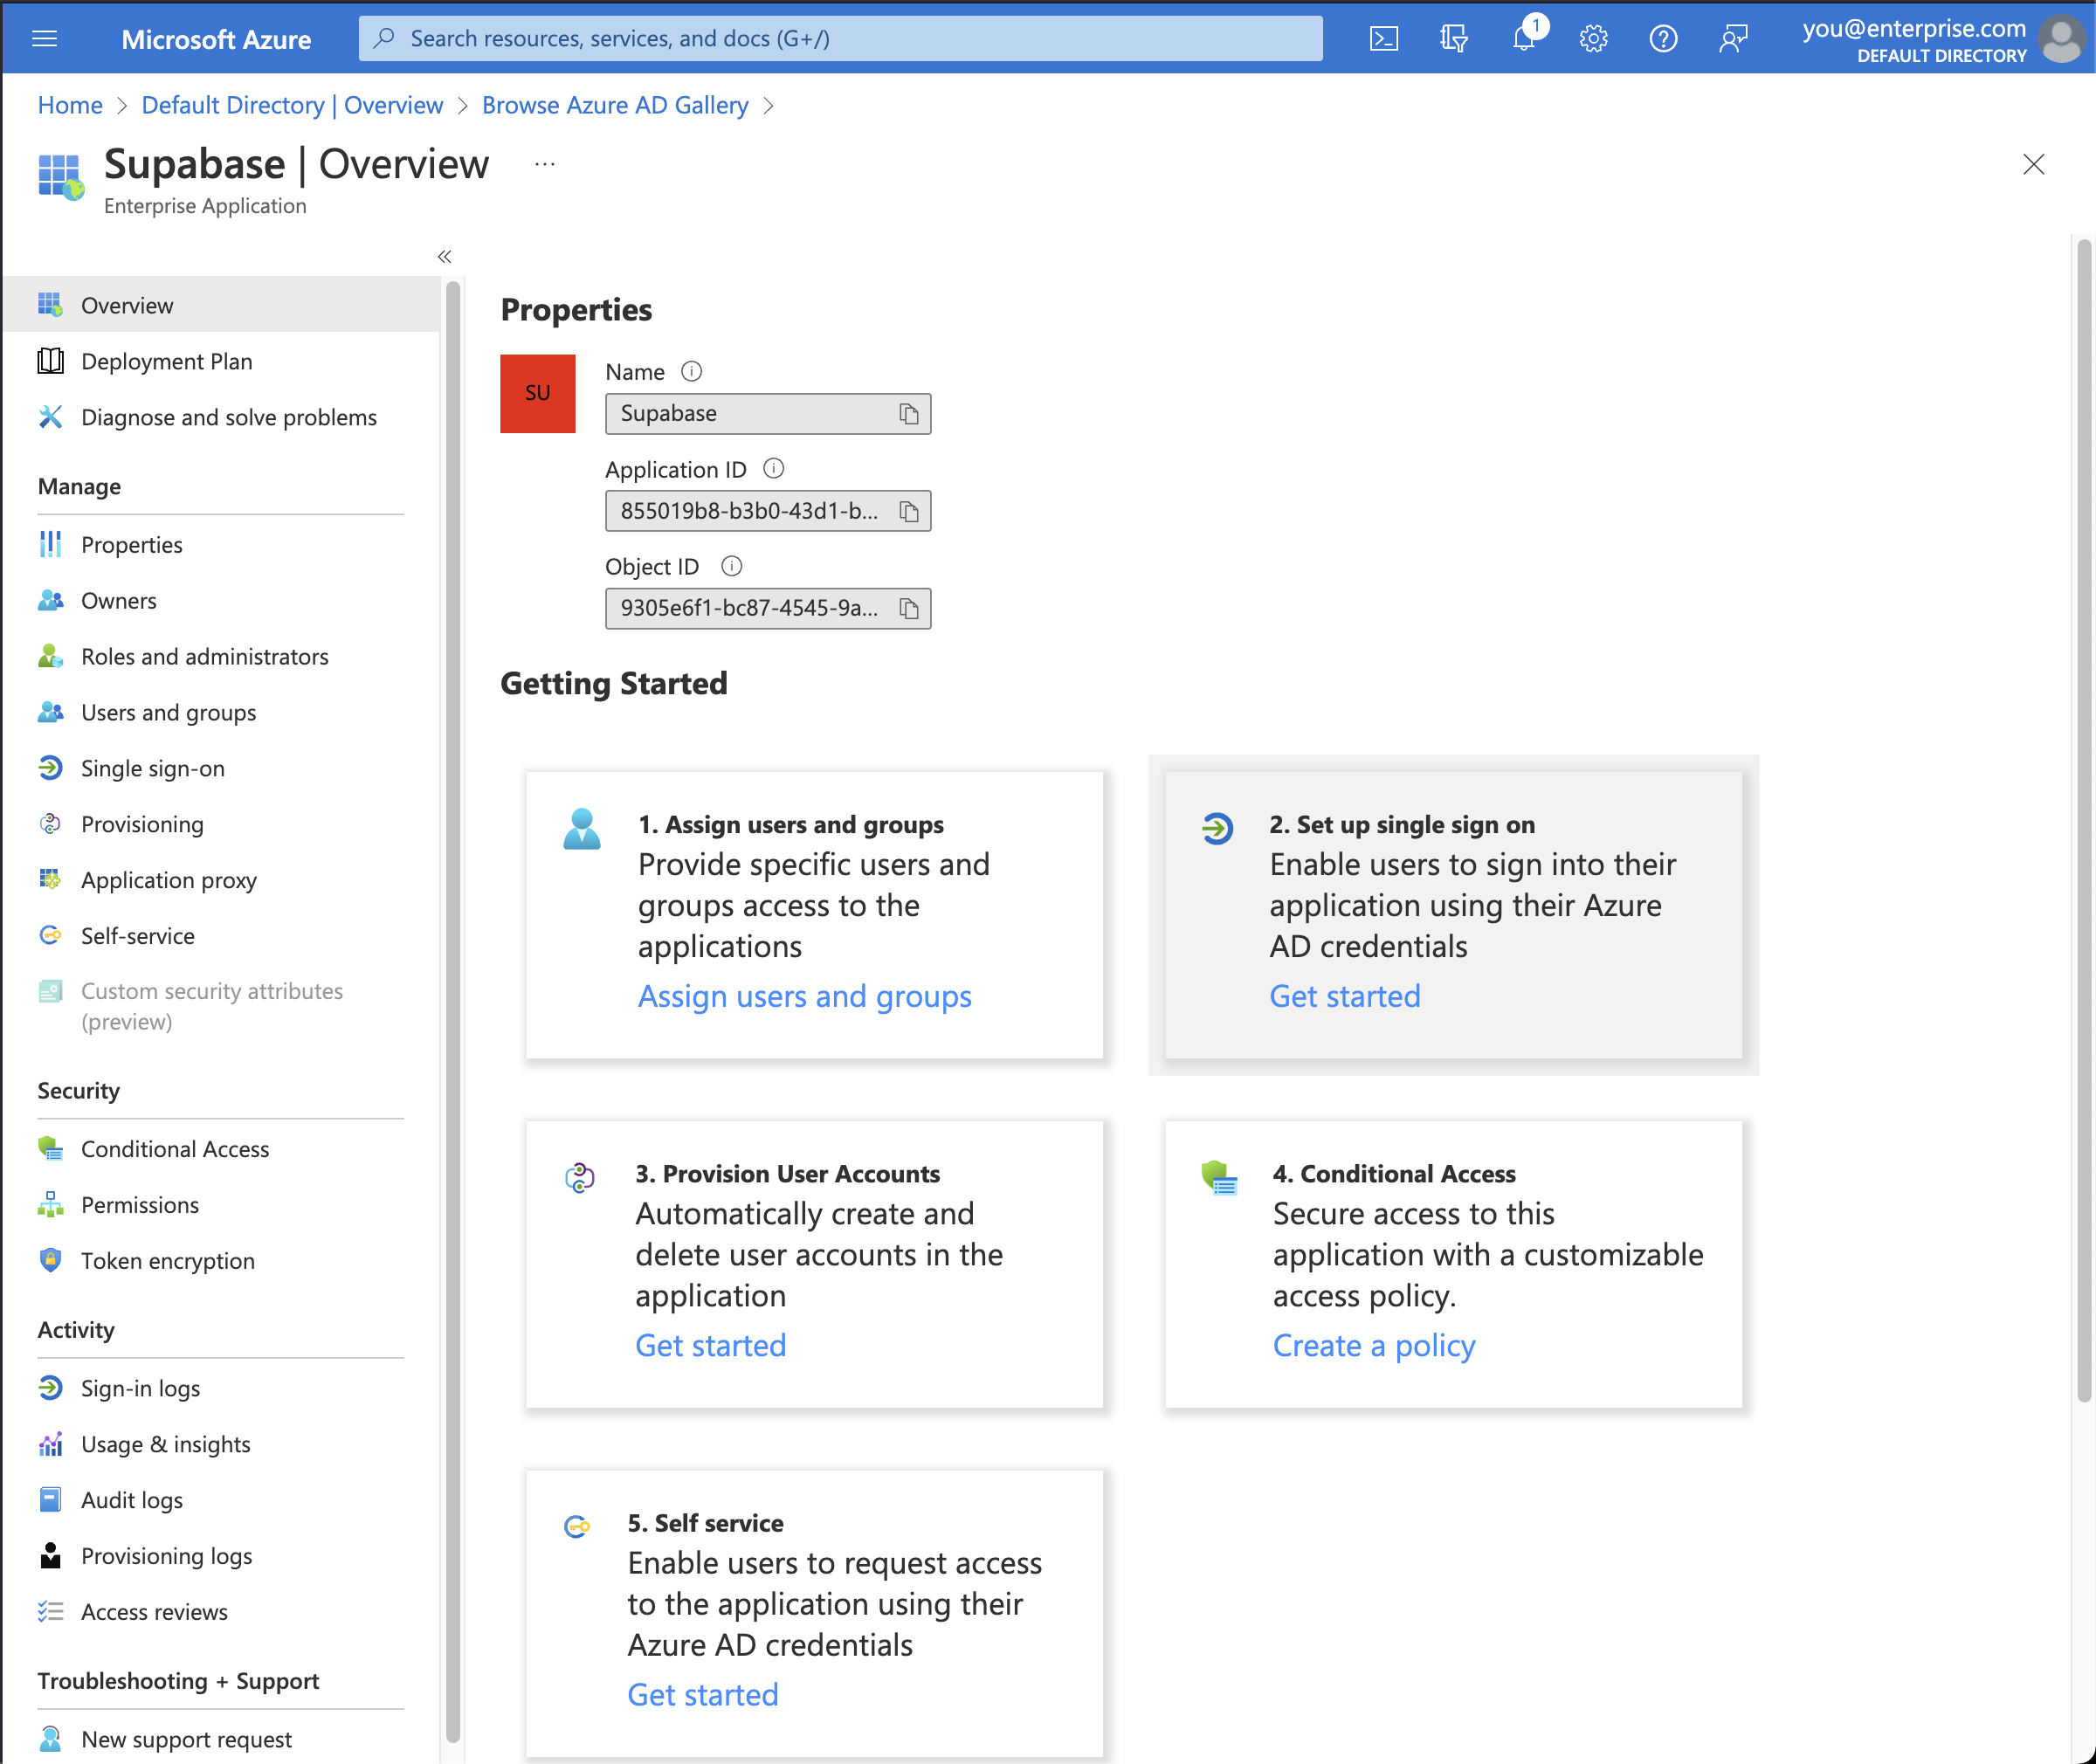
Step 4: Set up single sign-on
Before you get to assigning users and groups, which would allow accounts in Azure AD to access Supabase, you need to configure the SAML details that allows Supabase to accept sign in requests from Azure AD.
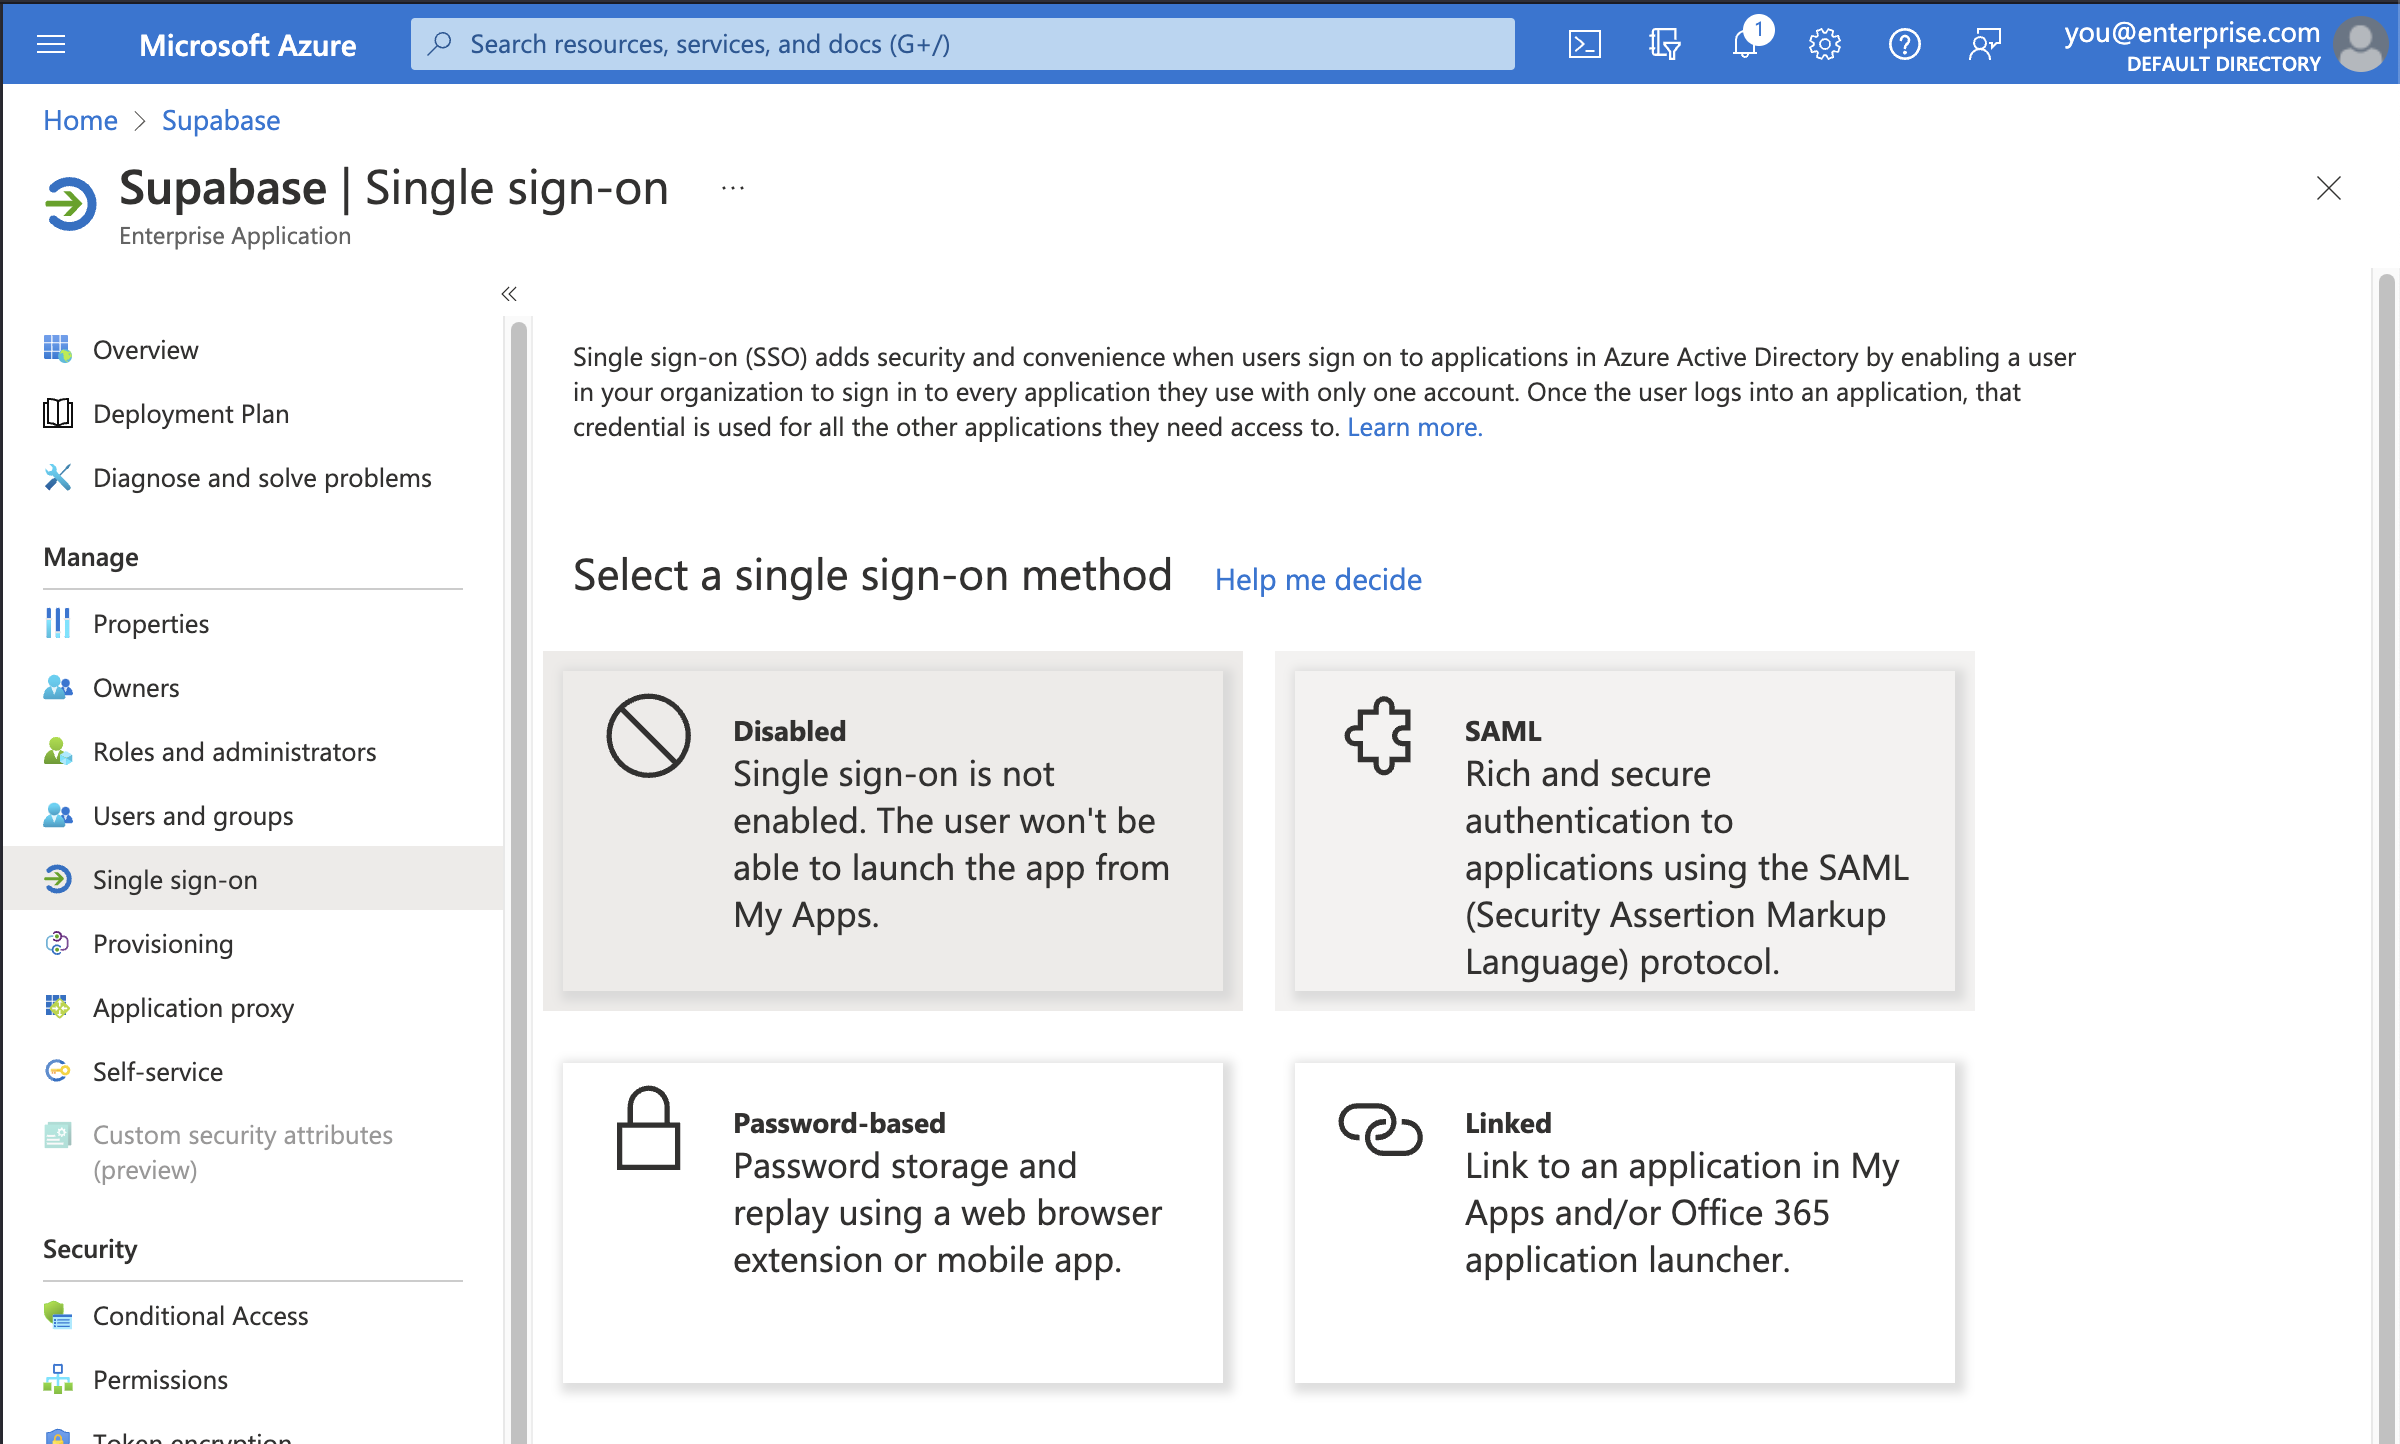
Step 5: Select SAML single sign-on method
Supabase only supports the SAML 2.0 protocol for Single Sign-On, which is an industry standard.
Step 6: Upload SAML-based sign-on metadata file
First you need to download Supabase's SAML metadata file. Click the button below to initiate a download of the file.
Alternatively, visit this page to initiate a download: https://alt.supabase.io/auth/v1/sso/saml/metadata?download=true
Click on the Upload metadata file option in the toolbar and select the file you just downloaded.
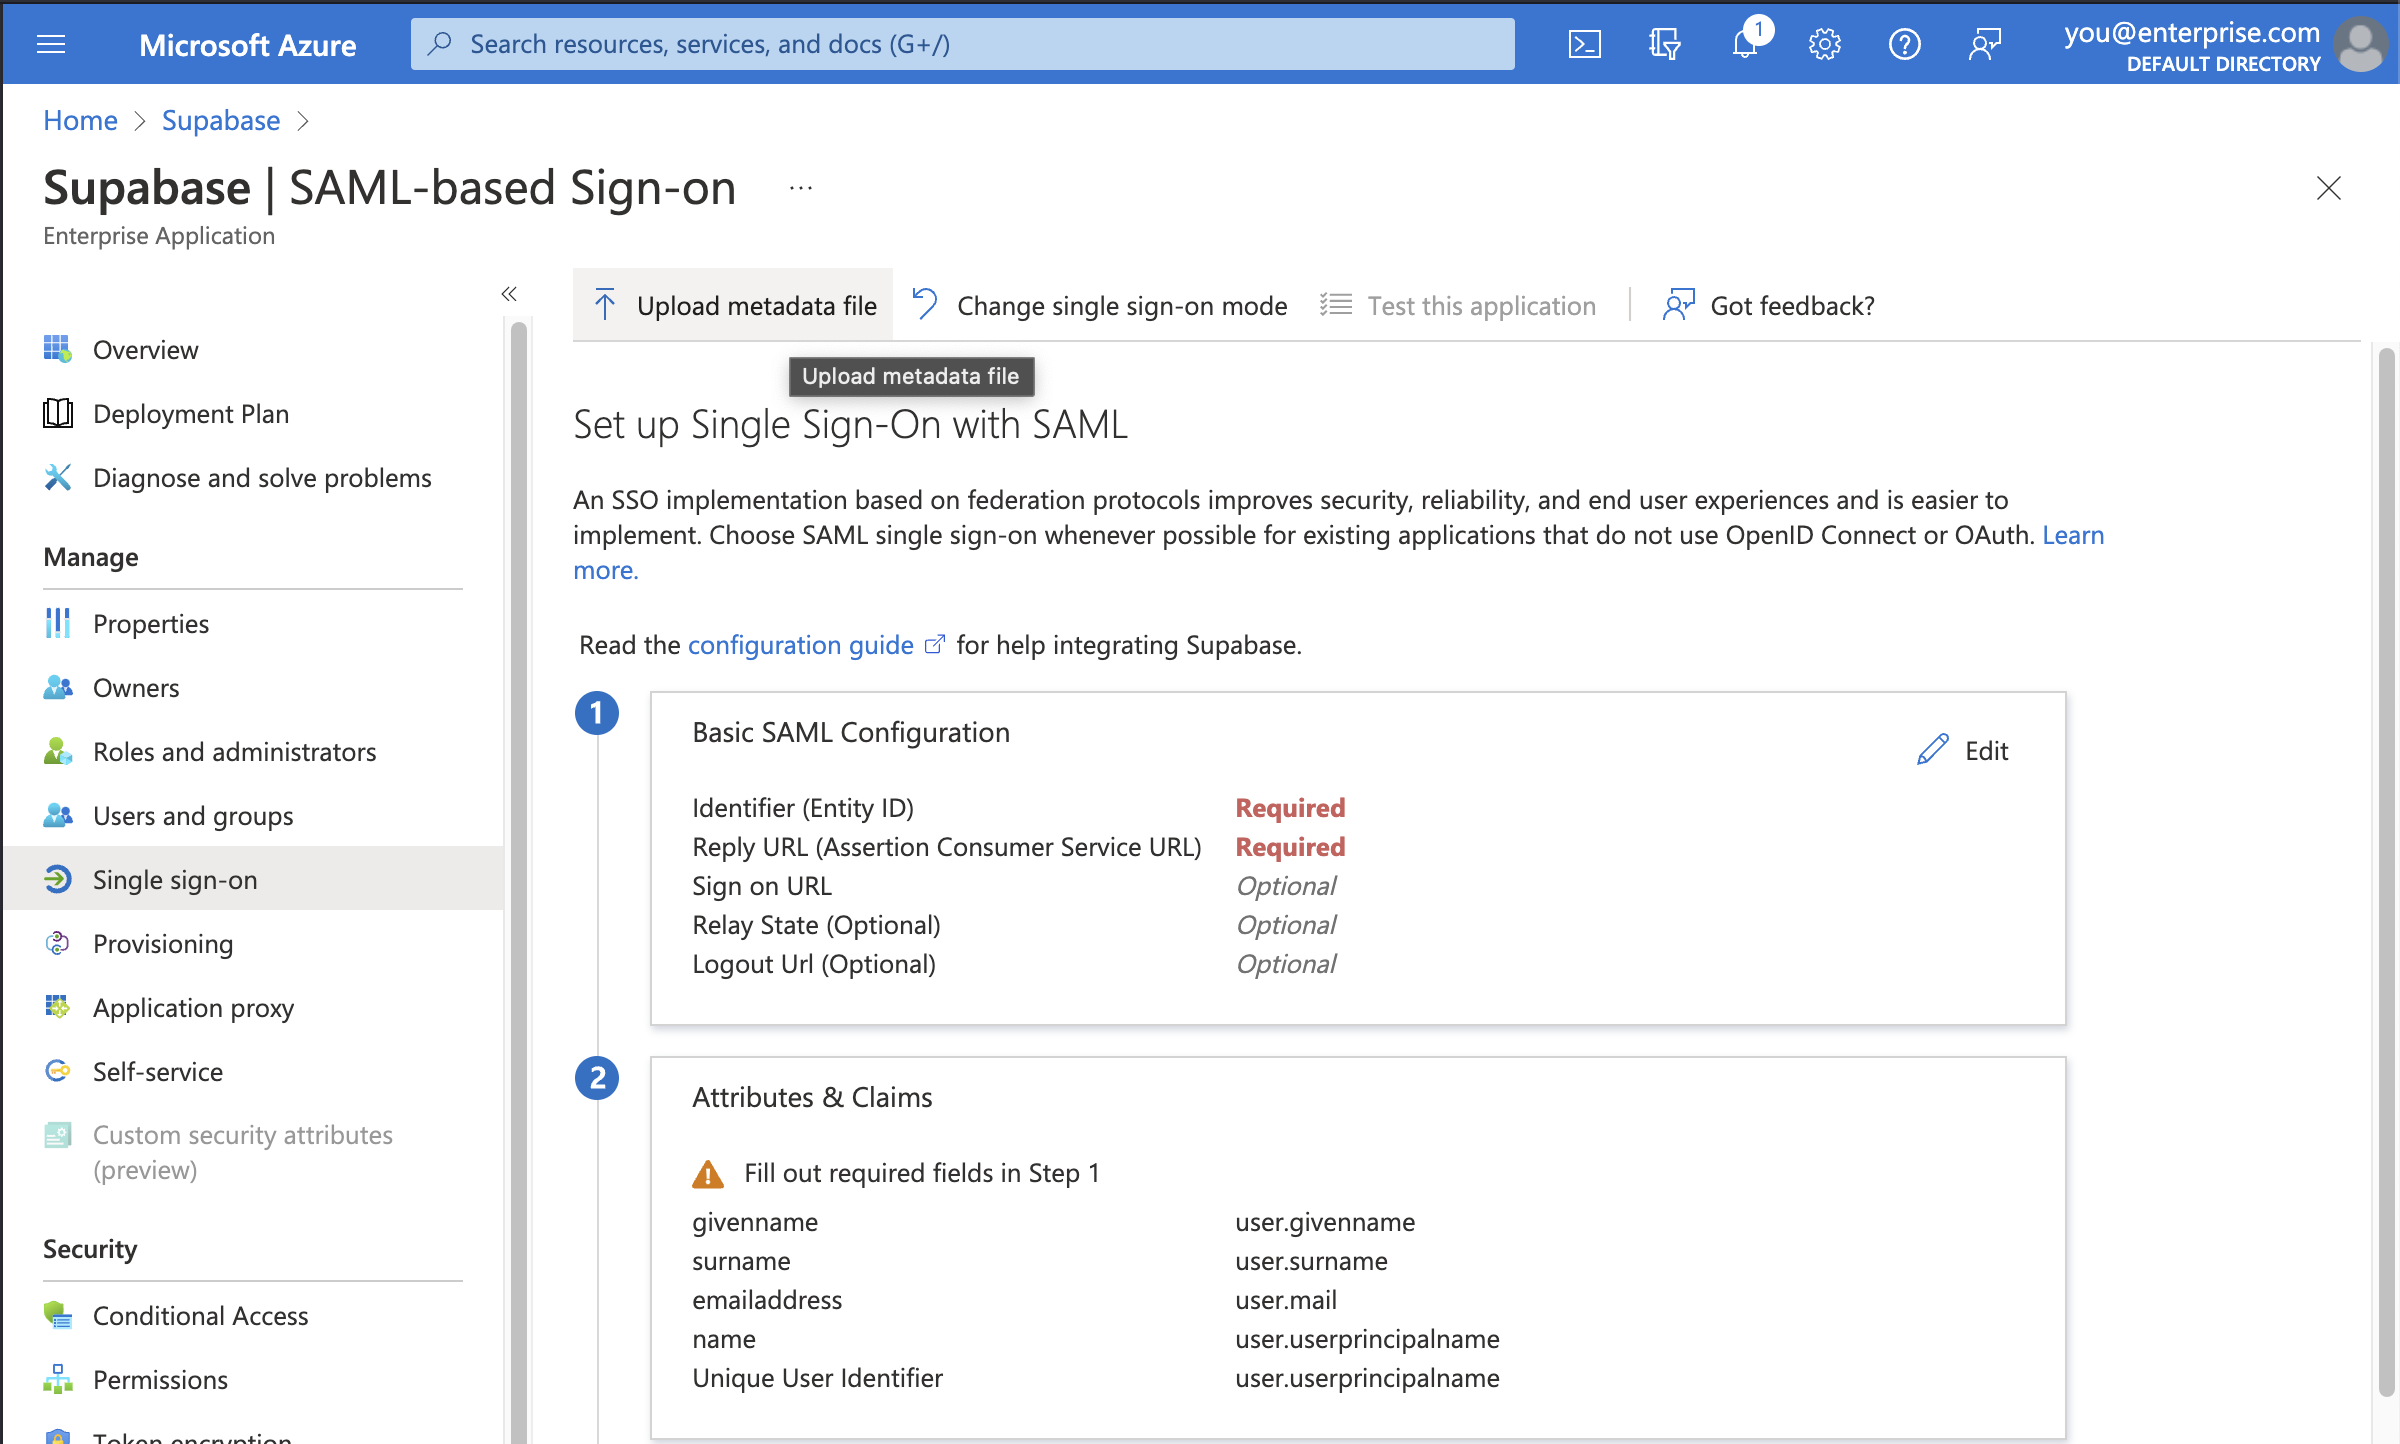
All of the correct information should automatically populate the Basic SAML Configuration screen as shown.
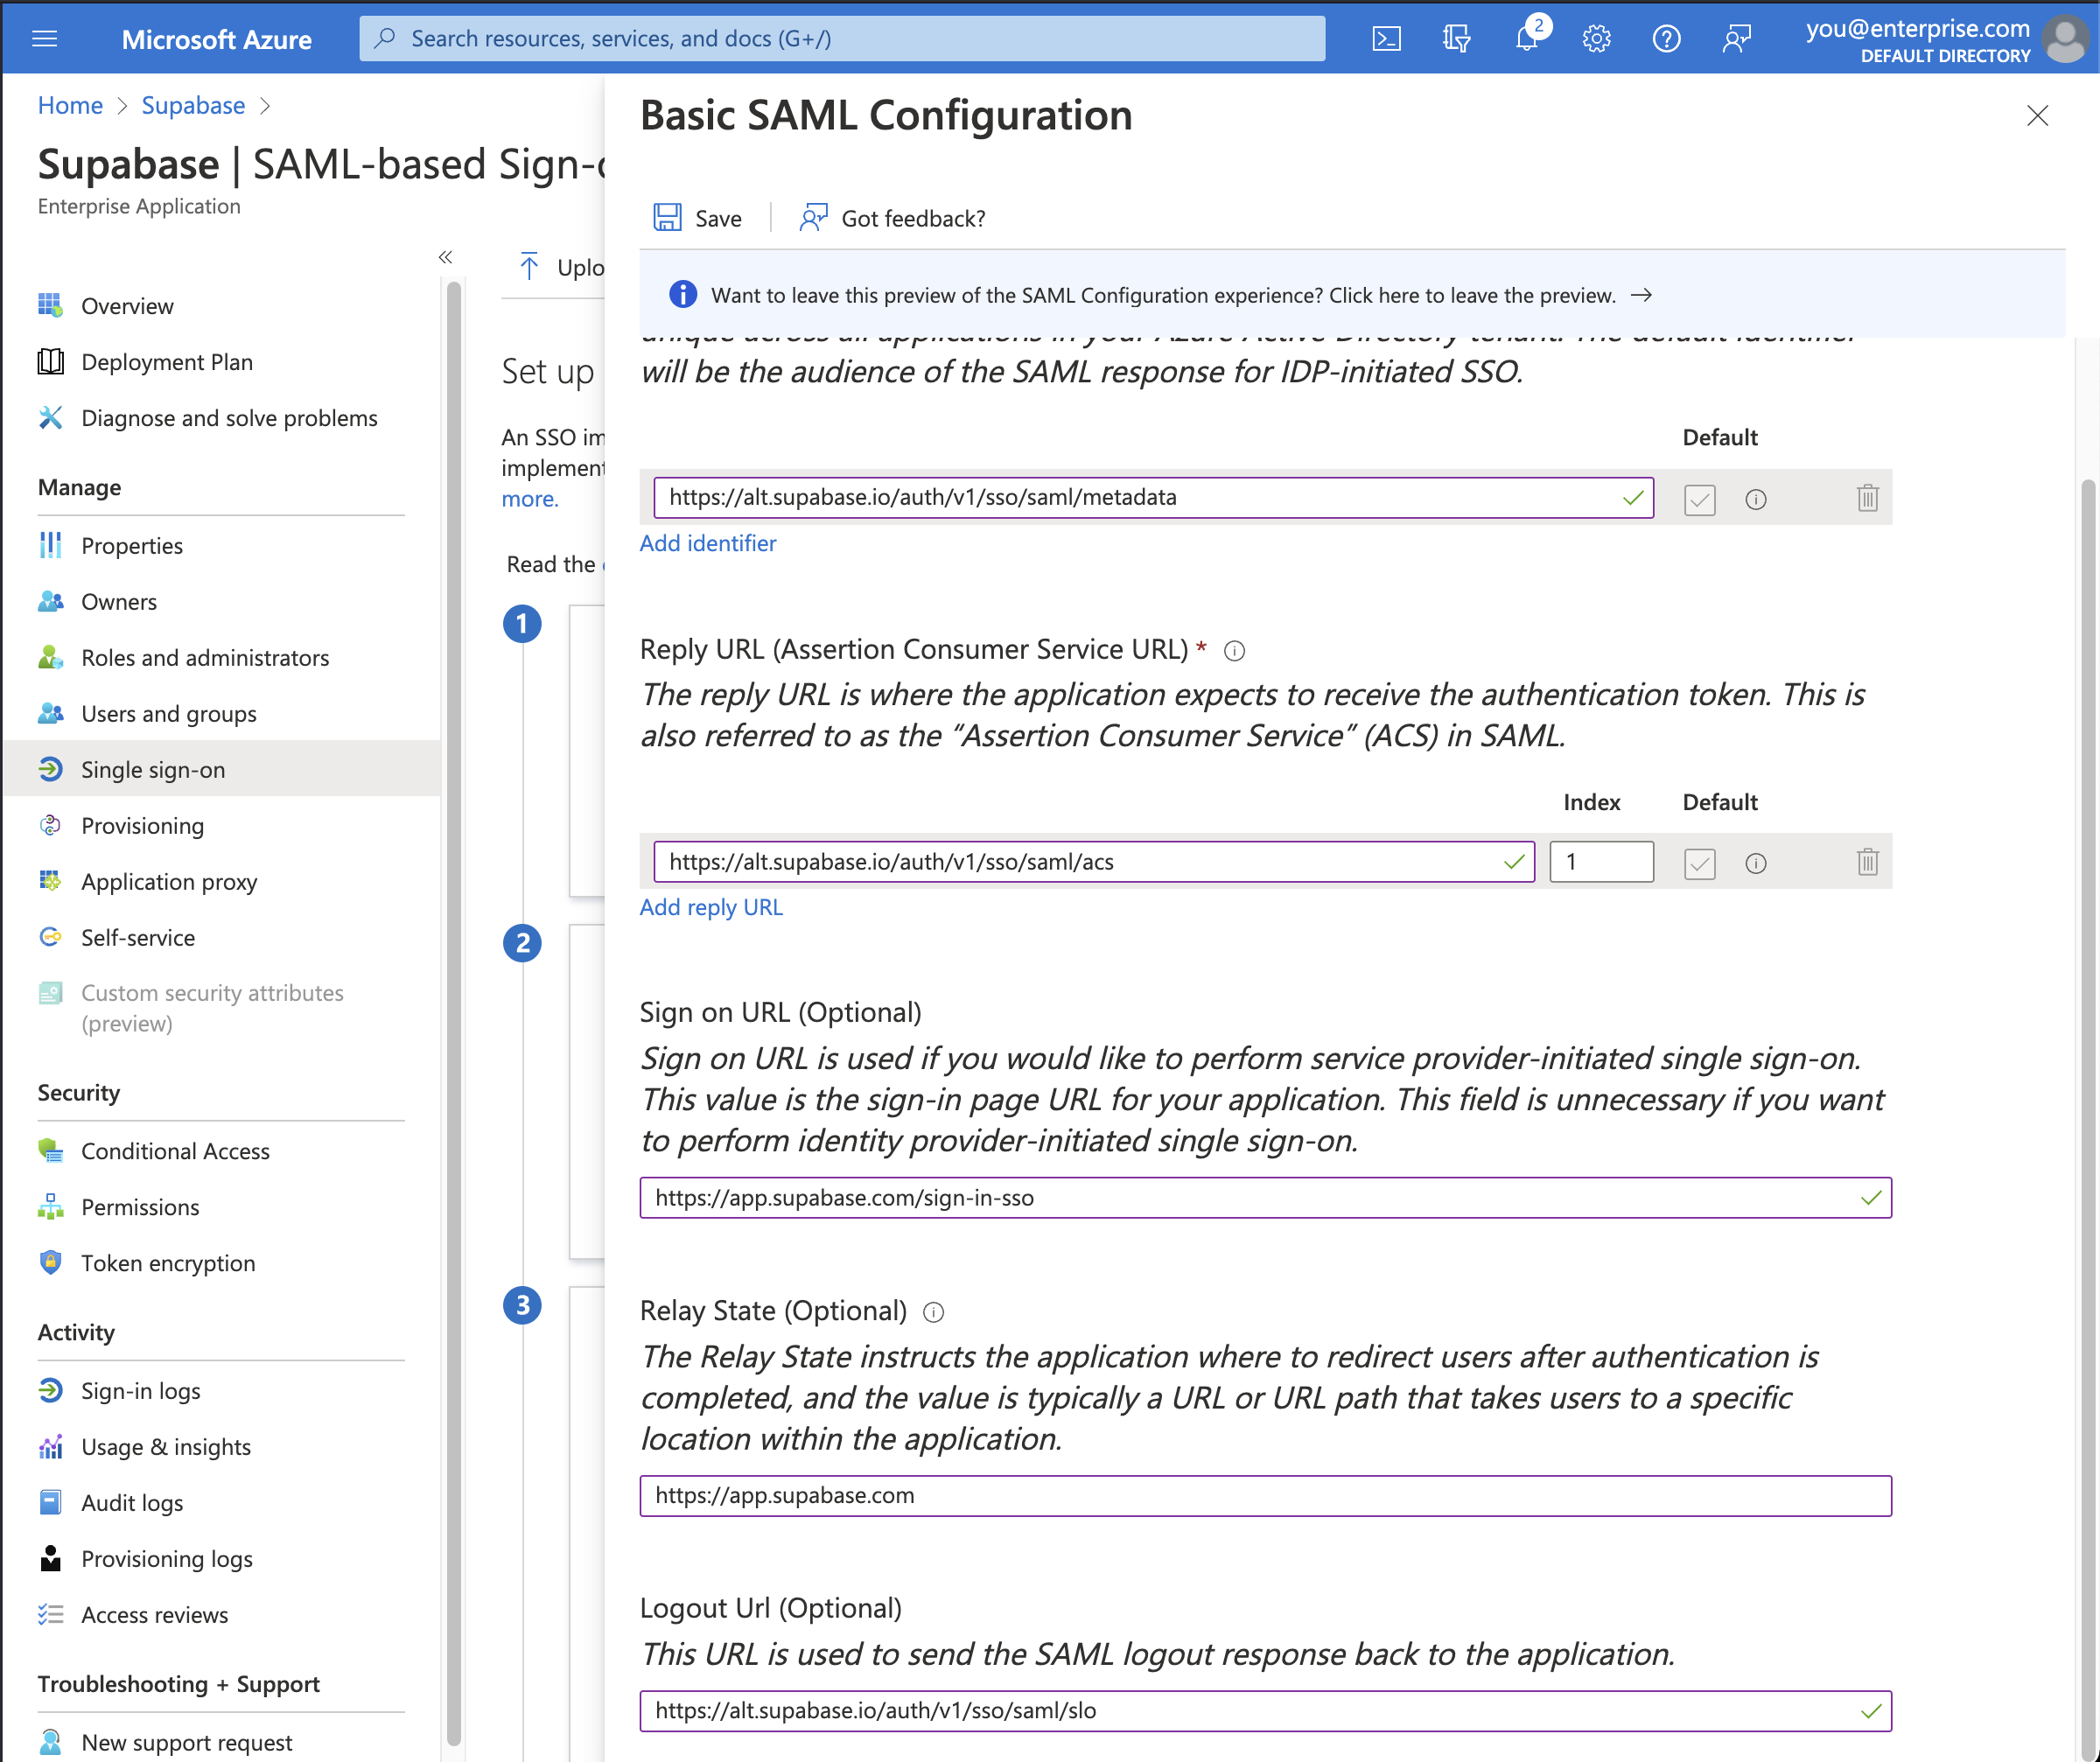
Make sure you input these additional settings.
| Setting | Value |
|---|---|
| Sign on URL | https://supabase.com/dashboard/sign-in-sso |
| Relay State | https://supabase.com/dashboard |
Finally, click the Save button to save the configuration.
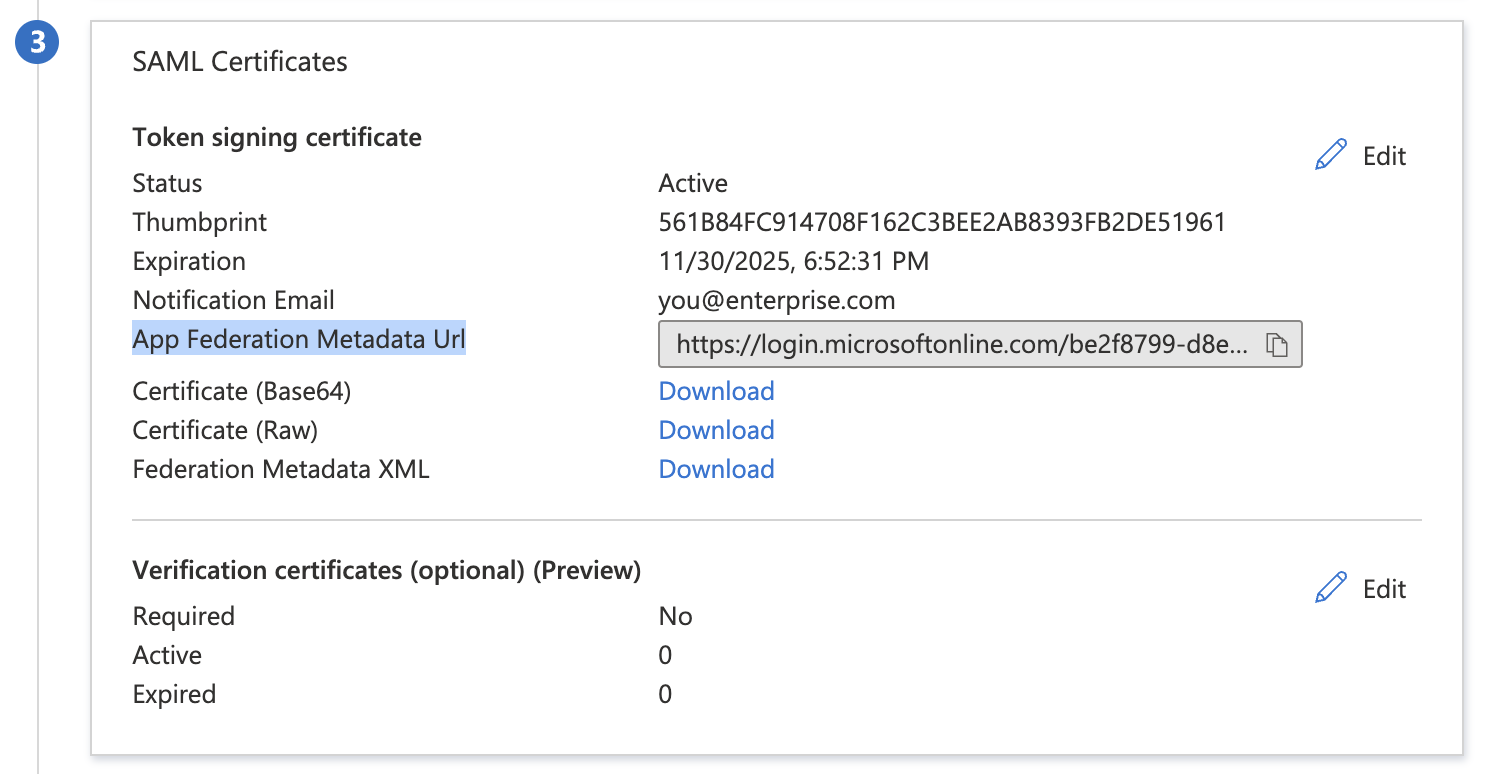
Step 7: Obtain metadata URL
Save the link under App Federation Metadata URL in *section 3 SAML Certificates*. You will need to enter this URL later in Step 10.
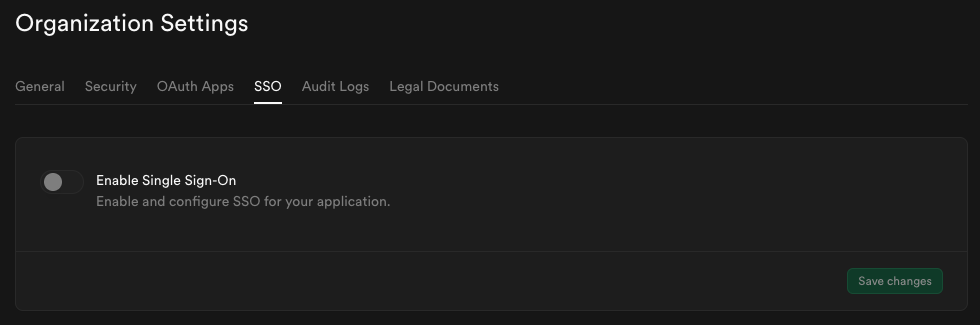
Step 8: Enable SSO in the Dashboard
-
Visit the SSO tab under the Organization Settings page.
-
Toggle Enable Single Sign-On to begin configuration. Once enabled, the configuration form appears.
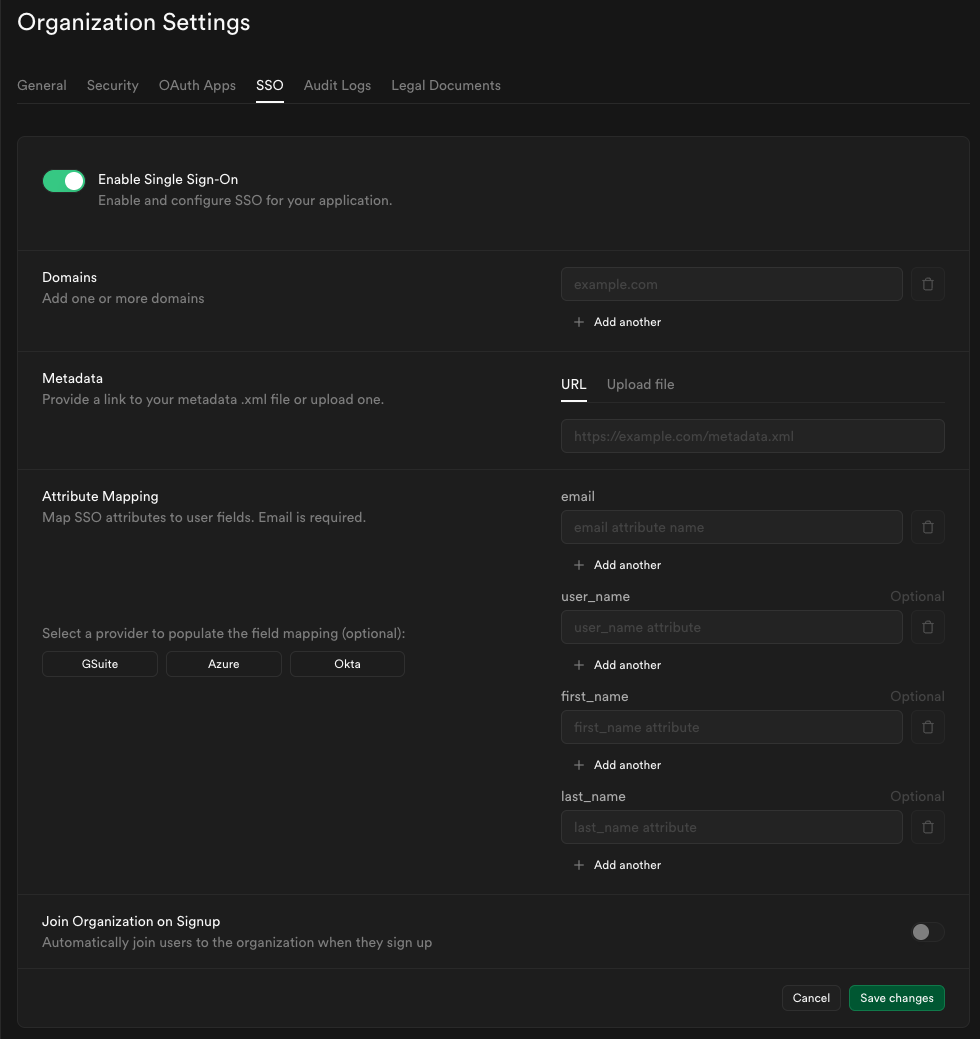
Step 9: Configure domains
Enter one or more domains associated with your users email addresses (e.g., supabase.com).
These domains determine which users are eligible to sign in via SSO.

If your organization uses more than one email domain - for example, supabase.com for staff and supabase.io for contractors - you can add multiple domains here. All listed domains will be authorized for SSO sign-in.

We do not permit use of public domains like gmail.com, yahoo.com.
Step 10: Configure metadata
Enter the metadata URL you obtained from Step 7 into the Metadata URL field:

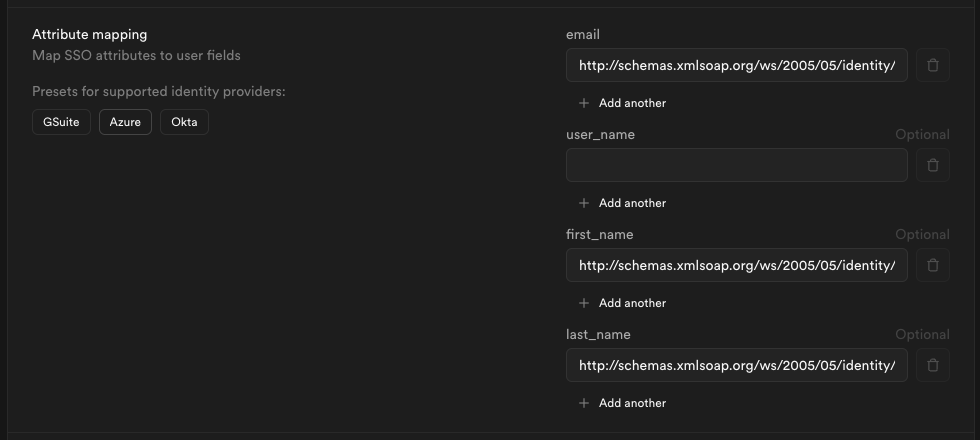
Step 11: Configure attribute mapping
Fill out the Attribute Mapping section using the Azure preset.
Step 12: Join organization on signup (optional)
By default this setting is disabled, users logging in via SSO will not be added to your organization automatically.

Toggle this on if you want SSO-authenticated users to be automatically added to your organization when they log in via SSO.

When auto-join is enabled, you can choose the default role for new users:
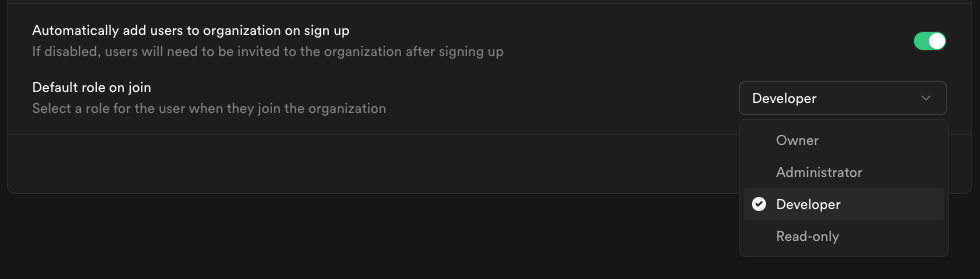
Choose a role that fits the level of access you want to grant to new members.
Visit access-control documentation for details about each role.
Step 13: Save changes and test single sign-on
When you click Save changes, your new SSO configuration is applied immediately. From that moment, any user with an email address matching one of your configured domains who visits your organization's sign-in URL will be routed through the SSO flow.
We recommend asking a few users to test signing in via their Azure AD account. They can do this by entering their email address on the Sign in with SSO page.
If SSO sign-in doesn't work as expected, contact your Supabase support representative for assistance.